

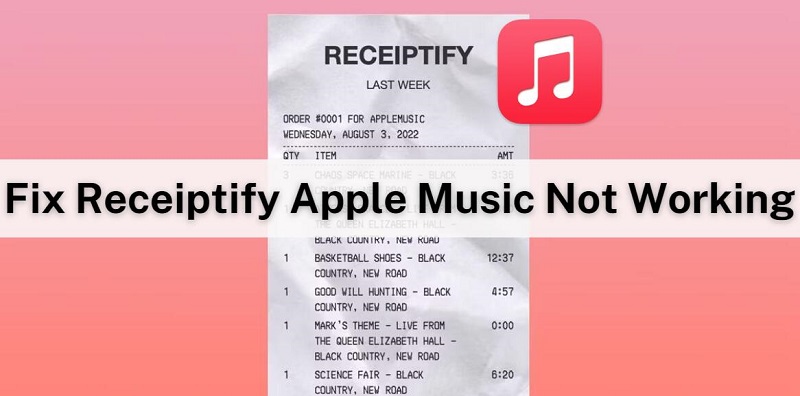
Receiptify is a website app created by developer Michelle Liu. Like similar top track generator apps, it scans your music streaming playlists and top tracks to create a shop-style receipt ranking your most played tracks from top to bottom and also lets you share your music preferences on social media. Receiptify supports a range of platforms including Spotify, Last.fm, and Apple Music.
However, Apple Music may not work as expected. Because Apple Music's API is different from other platforms, it only offers a "Heavy Rotation" list. There is no time period used to refine this data, so Receiptify will not be able to create playlists for a specific time period. Some people may even find that Receiptify is not working with Apple Music. If this happens to you, here are some things you can do to get it running smoothly again.
Part 1. Fix Receiptify Apple Music Not Working
To fix Receiptify Apple Music not working, there are several troubleshooting steps that can be taken to resolve the issue. Here are some possible solutions to consider:
1.1 Ensure to Enable Pop-Ups
Block Ups may block Receiptify. This is the most common issue that causes Receiptify Apple Music not to work. In this case, check the pop-up status in your browser settings. Alternatively, you can follow the steps below to easily enable pop-ups.
Here we'll take Google Chrome as an example: On your computer, open Chrome. Head to the Settings menu. Then, click on Privacy > security. Click on Site Setting and then on Pop-Ups and re-direct. Next, enable pop-up is disabled. Once done, try logging into Apple Music again from the Receiptify website.
1.2 Check Internet Connection
The most common cause is a poor internet connection. Receiptify needs a stable internet connection to generate your music receipts. If you're experiencing connectivity issues, Receiptify may not be working as intended. Try checking to see if you're connected, and if not, try switching to a more reliable one.
1.3 Check Apple Music Subscription Status
Another reason could be that your Apple Music subscription has expired or is inactive. Receiptify syncs with your Apple Music account, so if your subscription has a problem, it can't access your music history. Make sure your subscription is active and up to date.
1.4 Reload the Receiptify Website a Few Times
The developers behind Receiptify note that increased traffic might cause errors. If this happens to you, refresh the site a couple of times.
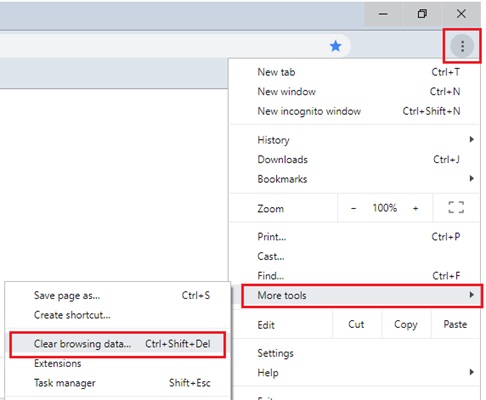
1.5 Clear Browser Cache Files
If it continues to fail, you may need to clear your cookies and other data from the site in order for it to work properly. Each web browser contains cache files when you visit different websites. This helps to make the web experience faster. But sometimes a few cached files get corrupted and result in a bad experience for other visited websites like Receiptify. Therefore, it is possible that your browser may have corrupted cache files on your computer. In this case, we recommend that you clear all cache files stored in your web browser. With the steps given here, we have taken Google Chrome as a reference for how to clear the cache files.
Open Google Chrome on your computer. Click the More icon appearing at the top right. Under More tools click on Clear browsing data. Choose a time range, like Last hour or All time. Select the types of information you want to remove. Click Clear data.
1.6 Compatibility Problems
Receiptify may not work properly on certain browsers or devices. Trying a different browser or device will often resolve compatibility issues.
Part 2. How to Use Receiptify for Apple Music
After trying these fixes, your Receiptify for Apple Music might be back to its normal state. Now we are going to show you how to set up a receipt for Apple Music using Receiptify.
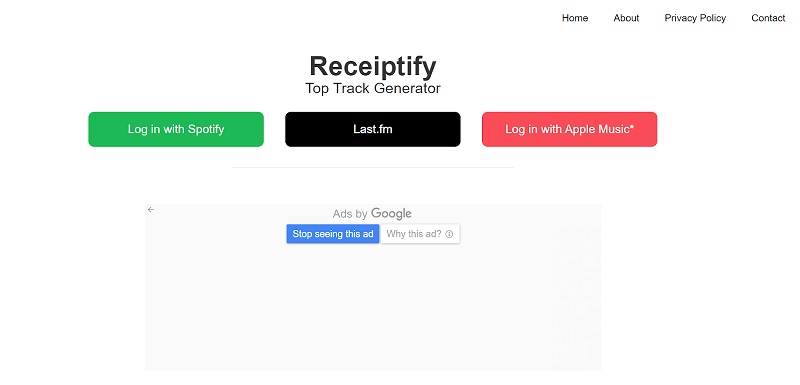
Step 1. Head to the Receiptify website, and click on the "Log in with Apple Music" button and enter your Apple Music account details.
Step 2. Once logged in, you'll be prompted to authorize Receiptify to access your Apple Music listening history. Then click "Allow".
Step 3. Now that you have connected to your Apple Music account, you are ready to generate a receipt for Apple Music. Once you receive your Apple Music receipt from Receiptify, click "Download Image" below the receipt to download it. Then you can share your Apple Music receipt to multiple social media platforms.
Part 3. Safe Alternatives to Apple Music Receiptify
If you've tried all the fixes and the Receiptify Apple Music still doesn't work for you. Here are some safe, similar alternatives for tracking your listening history.
3.1 Apple Music Replay
Like Spotify Wrapped, Apple Music Replay is an official feature of Apple Music that allows users to view the number of plays of Apple Music songs and the amount of time spent listening to Apple Music over a year. From February 2024, Apple Music also introduced a monthly version of the Replay experience, which allows users to view their monthly listening habits, giving them additional access to their listening insights. To access Apple Music Replay, please follow the steps below.
See Apple Music Replay through the website: Go to replay.music.apple.com. Sign in with the same Apple ID that you use with your Apple Music subscription. Tap or click "Jump In." From here, you can get insights every month, see your year-end Replay, share insights etc.
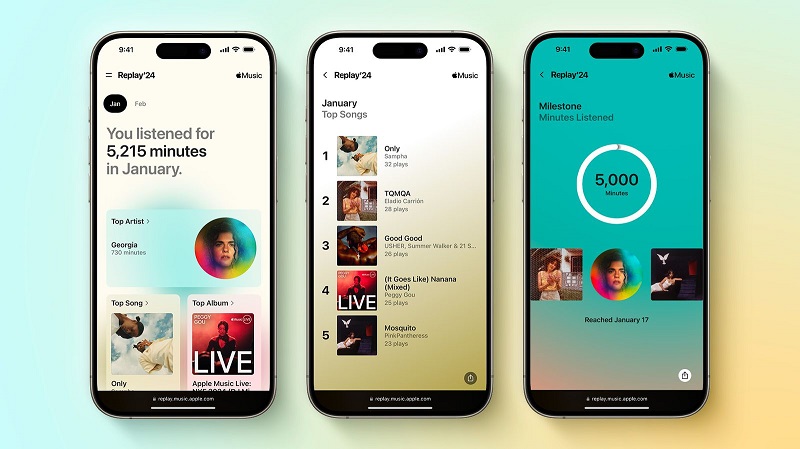
See Apple Music Replay via the app: Open the Apple Music app, select "Listen now," and scroll down to "Replay." From there, you can listen to your top songs from the year so far, add the playlist to your music library, share on social media, and more.
3.2 Switch Apple Music to Spotify or Last.fm
Receiptify's user experience with Spotify and Last.fm is stronger compared to Apple Music. If you're looking to switch from Apple Music to other streaming platforms, Spotify and Last.fm are the two great choices, as they are dedicated to accurately tracking the listening history and trends of a user's music tastes.
Part 4. Download Most-Played Tracks on Apple Music Receiptify
With Receiptify for Apple Music, you can turn your top tunes into stylish receipts. However, it doesn't allow you to download songs to listen to offline. To download Apple Music songs locally, Macsome iTunes Converter may be useful. This professional application is specifically designed to download Apple Music songs, podcasts, iTunes M4P music, and audiobooks locally. Besides, it can also convert Apple Music to MP3, AAC, FLAC, WAV, AIFF, and ALAC formats with the best original sound quality preserved. So, you can play your downloaded Apple Music tracks without restrictions and even upload them to Spotify with Macsome iTunes Converter.
It can also preserve almost all ID3 tags after conversion, such as title, artist, album, artwork, track number, disc number, year, comment, genre, album, artist, and composer. In addition, Macsome can download lyrics from Apple Music, so you can view lyrics offline. It also offers useful built-in tools that let you separate vocals and music from songs, quickly edit music files, convert local Audible audiobooks, edit tags (such as title, artist, album) of local tracks, convert music files to popular audio formats, and more.
Key Features of Macsome iTunes Converter
- Easily download Apple Music songs, podcasts, iTunes M4P music, and audiobooks.
- Convert Apple Music to MP3, AAC, WAV, FLAC, AIFF, and ALAC.
- Retain 100% original audio quality & Keep and edit ID3 tag information.
- Convert common audio files to MP3, M4A, FLAC, WAV, OGG, and AIFF.
- Support recording music from the Apple Music app and web player.
- Batch download at up to 10X conversion speed.
Detailed Steps to Download Most-played Songs from Apple Music
The following detailed steps will show you how to download songs, albums, and playlists from Apple Music by using Macsome iTunes Converter, so you can listen offline when you're on the go. Before you begin, please make sure that you've downloaded and installed the latest version of the Macsome iTunes Converter. This application works well on both Windows and Mac platforms.
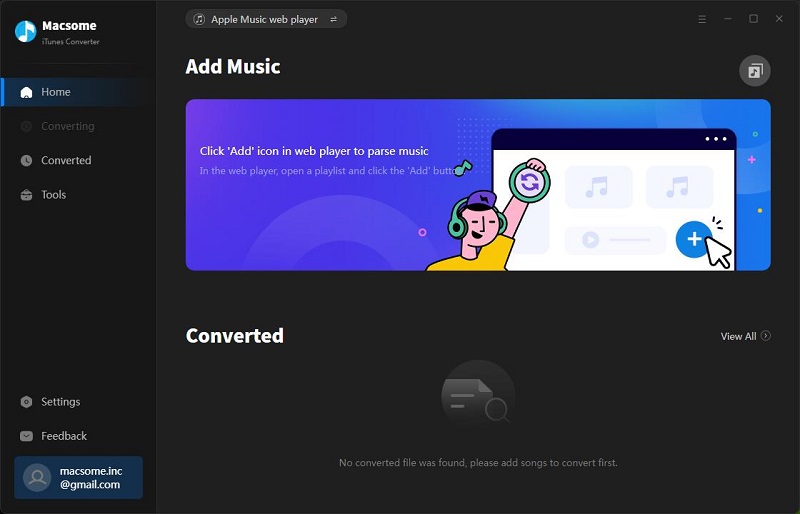
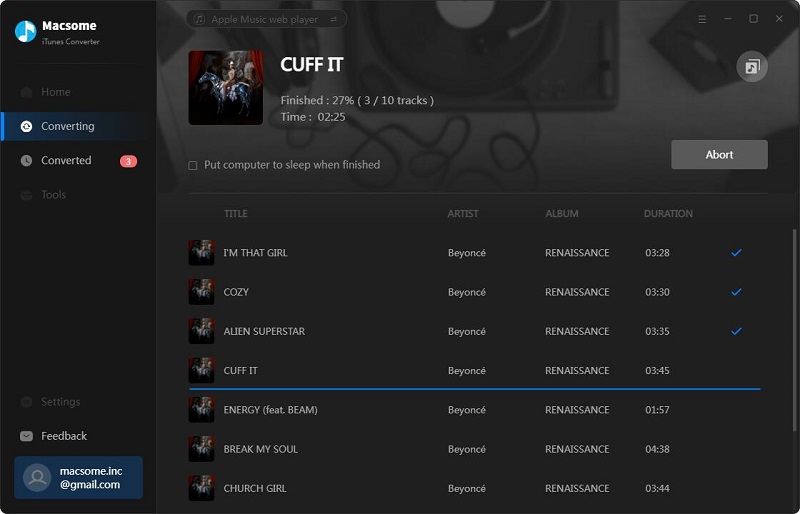
Step 1. Launch Macsome iTunes Converter.
Launch Macsome iTunes Converter on your computer, and the Apple Music web player will start simultaneously. Click the "Sign In" button in the top-right corner, then sign in with your Apple ID.
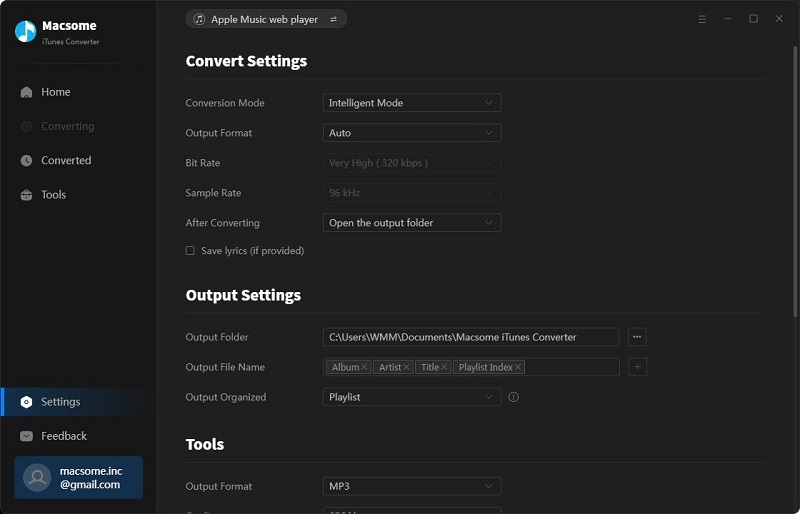
Step 2. Choose the Output Format or Other Output Parameters.
Click on the "Settings" option, which is located in the bottom left-hand corner of the application, and select the appropriate output format, including MP3, AAC (.m4a), FLAC, WAC, AIFF, and ALAC (.m4a). If you choose Auto by default, you will get the same quality of output as you get from the original files. Besides, you can also change the output quality, output path, output file name, etc.
Note: Macsome iTunes Converter offers two different conversion modes: Record from App and Record from Web. If you'd like to download Apple Music from the iTunes (Apple Music) app, choose "Record from App" from the Convert Option tab.
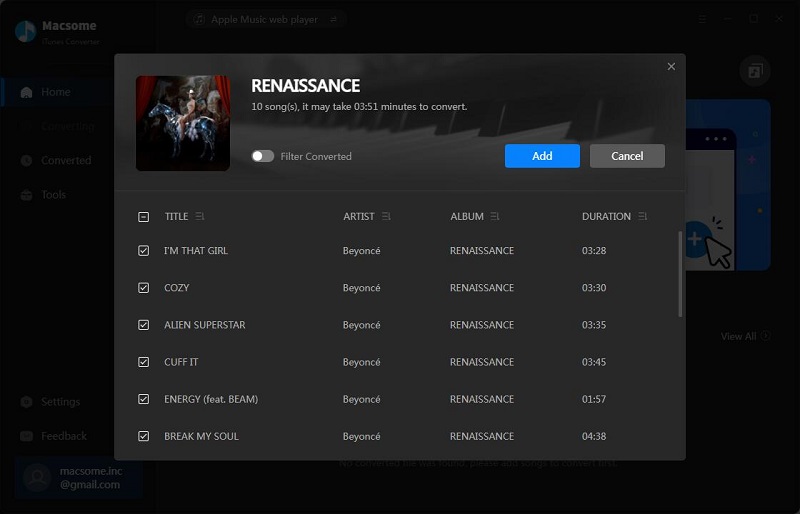
Step 3. Add Apple Music Songs to Macsome.
In the Apple Music web player, head to the playlist you want to download, tap the "Click to add" icon in the bottom-right corner of the screen, and all the tracks will be loaded into the adding window. Just tick off the songs you want, then click on the "Add" button, and the songs will be made available for you to download.
Step 4. Start to Download Apple Music for Offline Listening.
Simply click on the "Convert" button, and the conversion will start automatically. Please be patient, the downloading time will depend on the number of files you added and your network condition. When the download is complete, go to the "Converted" panel, and you'll find all your downloaded Apple Music files stored here. Now you'll be able to listen to your favorite Apple Music songs offline.
Part 5. Frequently Asked Questions about Receiptify Apple Music
Q1. Is Receiptify for Apple Music safe?
A: Yes, Receiptify is 100% secure. It connects to your Apple Music account using the official API developed by Apple Music, so your personal information is safe.
Q2. What kind of data does Receiptify collect from my Apple Music account?
A: Receiptify collects data about your listening history, such as the songs you have played most frequently. It does not collect any personally identifiable information, such as your contact details or payment information.
Q3. How do I download Receiptify Apple Music?
A: To download your Apple Music receipt, you'll see a button that says "Get Image" in the bottom right corner of the Receiptify website. Scroll down to find it. You can press this button and the download will start on the device you have selected.
Wrapping Up
By reading this article, you will be able to resolve the issue of Receiptify Apple Music not working. You can try refreshing the site or clearing your cookies and site data, checking if you have pop-ups enabled in your browser, etc. Then you are able to generate your most played tracks on Apple Music in the form of sales receipts. If the above doesn't work, you can get help from the Receiptify support team. What's more, you can also try to use the Apple Music Replay or switch to Spotify.
Even better, Macsome iTunes Converter allows you to download your favorite songs from Apple Music locally so that you can listen to Apple Music songs offline on any non-authorized device. It offers a free trial, which lets you convert one minute of each song. You can purchase the full version to remove this limitation and unlock all its features.